Super Agile: Not possible without unit tests
It is never too late to start writing unit tests. Add unit tests to your “Definition of Done” document. Automate your build process, so it runs unit tests with every code change.
It is never too late to start writing unit tests. Add unit tests to your “Definition of Done” document. Automate your build process, so it runs unit tests with every code change.
After upgrading to Ubuntu 12.04.3 LTS, I could not boot in GUI / X anymore. I got this when trying to start X:
startx

NVIDIA: API mismatch: the NVIDIA kernel module has version 304.88, but this NVIDIA driver component has version 304.108.
Please make sure that the kernel module and all NVIDIA driver components have the same version.
To fix that it seems you have to disable the xorg:nvidia_304_updates (304.108) driver and enable the xorg:nvidia_304 (304.88) driver:
After that you should have xorg:nvidia_304 listed as Proprietary, Enabled, In use:
sudo jockey-text --list
xorg:nvidia_173 - NVIDIA accelerated graphics driver (Proprietary, Disabled, Not in use)
xorg:nvidia_173_updates - NVIDIA accelerated graphics driver (post-release updates) (Proprietary, Disabled, Not in use)
xorg:nvidia_304 - NVIDIA accelerated graphics driver (Proprietary, Enabled, In use)
xorg:nvidia_304_updates - NVIDIA accelerated graphics driver (post-release updates) (Proprietary, Disabled, Not in use)
xorg:nvidia_96 - NVIDIA accelerated graphics driver (Proprietary, Disabled, Not in use)
And finally you have to reboot:
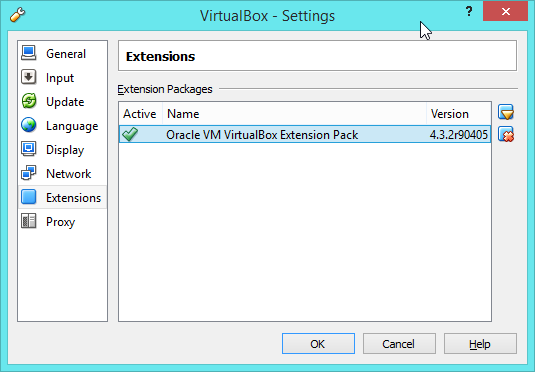
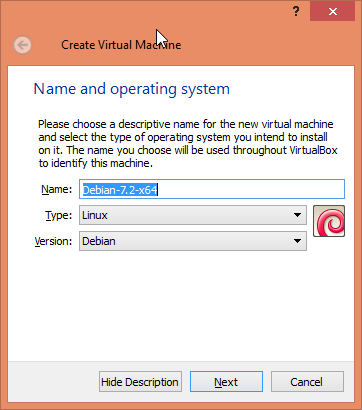
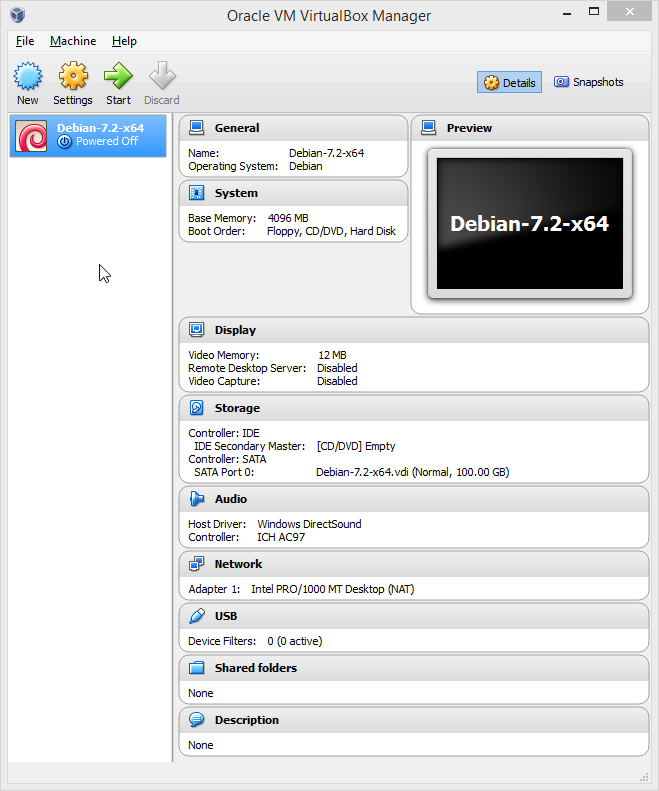
This post is about using Oracle VirtualBox to install a Debian 7.2 x86_64 guest virtual machine on Windows 8.1 host.
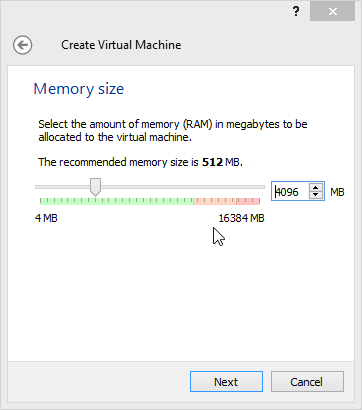
NOTE: If the Debian (64 bit) choice is not available, make sure Intel Virtualization Technology is enabled in the host UEFI / BIOS. 3. Memory size - Memory size: 4096 MB - Click Next 4. Hard drive - Choose Create a virtual hard drive now - Click Create - Choose VDI (VirtualBox Disk Image) - Click Create - File allocation and size - Select a path for the virtual disk image - Select 100 GB for size - Click Create
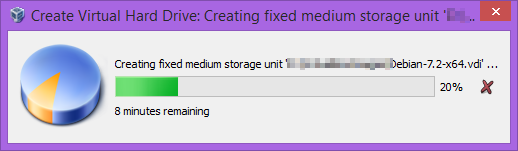
It takes a few minutes to create the virtual disk image, but eventually you will see the image in the VirtualBox Manager. We are ready to install Debian now.

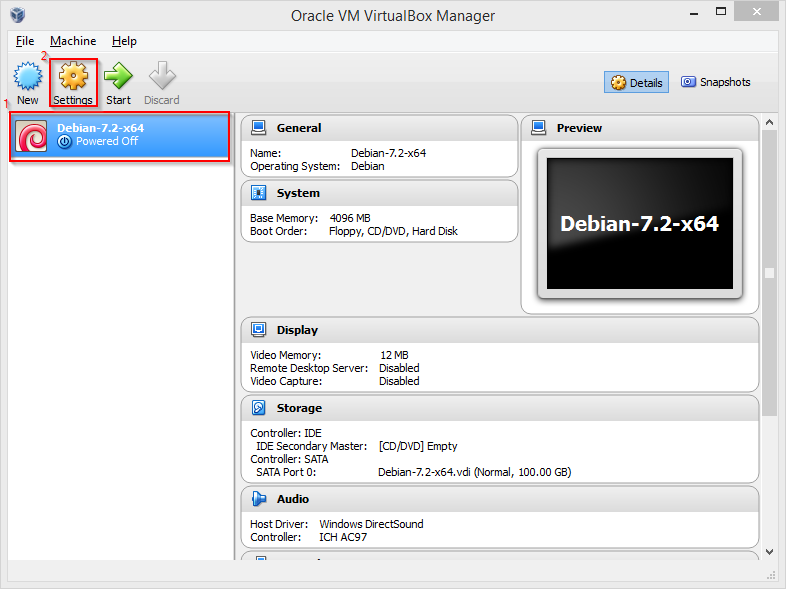
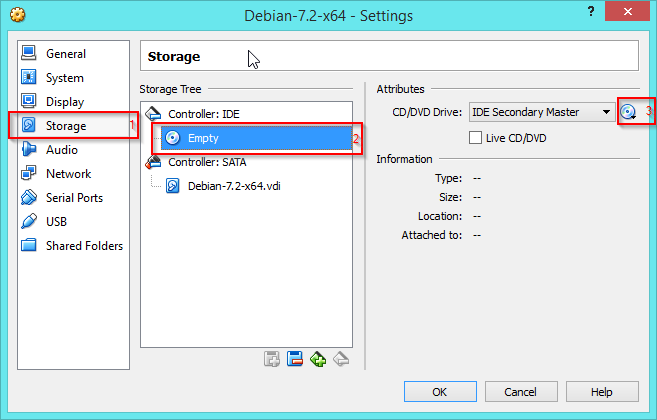
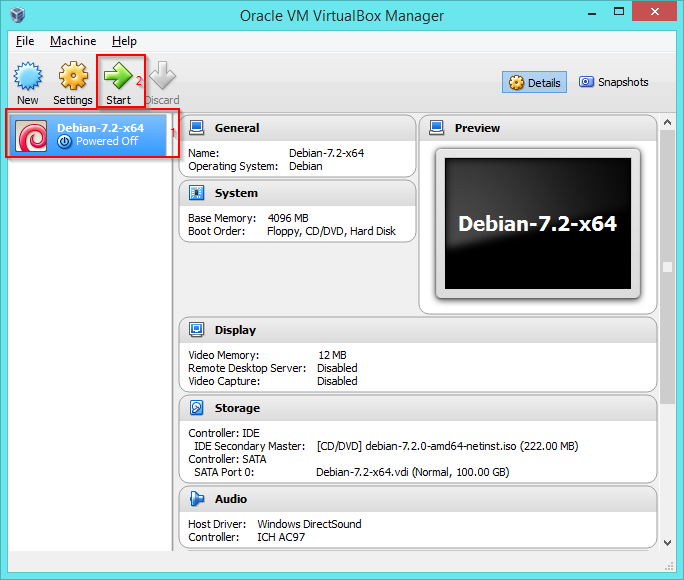
In VirtualBox Manager:
no images were found
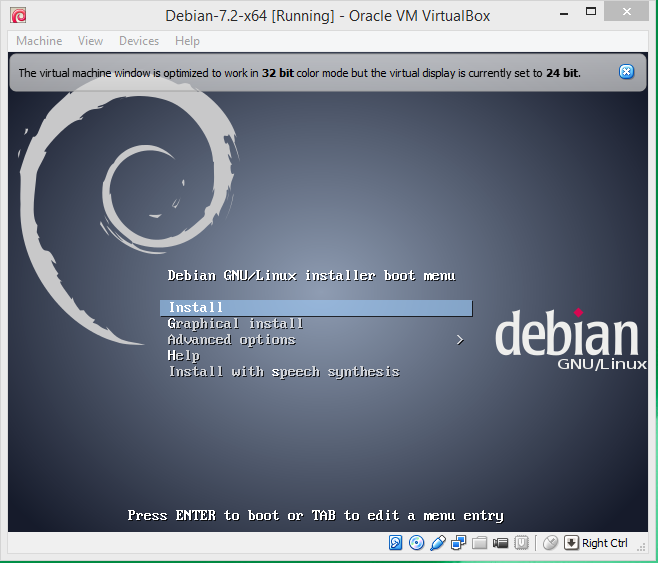
In the Debian Install boot menu:
Install Module Assistant, so you can build kernel modules.
Let Module Assistant prepare the system.
Install Guest Additions
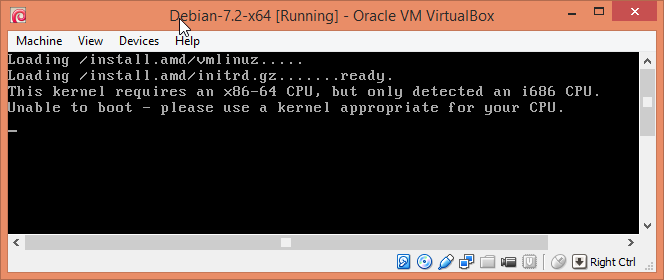
If the installation does not start or hangs, try booting using Advanced Options > Expert Install. That will give you more information about what is wrong with the installation.
I had to do this for AVBlocks xml licenses recently. It is not straightforward, but here is the C# code.
using System;
using System.Collections.Generic;
using System.IO;
using System.Linq;
using System.Text;
using System.Xml;
using System.Xml.Linq;
using System.Xml.XPath;

namespace Primo.LicenseBuilder.Xml
{
    public static class XmlExtensions
    {
        public static string ToSingleQuoteString(this XDocument xDocument,
                                                    System.Xml.Formatting formatting = Formatting.Indented)
        {
            using (StringWriter sw = new StringWriter())
            {
                using (XmlTextWriter writer = new XmlTextWriter(sw))
                {
                    writer.Formatting = formatting;
                    writer.QuoteChar = '\'';
                    writer.WriteNode(xDocument.CreateNavigator(), false);
                    writer.Flush();
                }

                return sw.ToString();
            }
        }
    }
}
I finally got fed up with SourceTree and installed TortoiseHg on my Mac development machine. Read on:
For best results make sure you have the latest XCode and Command Line Tools installed (XCode 5 and Command Line Tools September 2013 at the time of this writing). You can get them from the Apple Developer Downloads site.
You can skip the rest of this section if you have Ruby already installed.
Follow the instructions in the script. The installation will take a few minutes.
This returned a few problems for me, but the output will vary depending on the existing system configuration.
Warning: An outdated version of Git was detected in your PATH.
Git 1.7.10 or newer is required to perform checkouts over HTTPS from GitHub.
Please upgrade: brew upgrade git

Warning: /Library/Frameworks/Mono.framework detected
This can be picked up by CMake's build system and likely cause the build to
fail. You may need to move this file out of the way to compile CMake.

Warning: You have MacPorts or Fink installed:
    /Users/yourname/.rvm/bin/port, /opt/local/bin/port

This can cause trouble. You don't have to uninstall them, but you may want to
temporarily move them out of the way, e.g.

    sudo mv /opt/local ~/macports

Warning: /usr/bin occurs before /usr/local/bin
This means that system-provided programs will be used instead of those
provided by Homebrew.

Consider setting your PATH so that /usr/local/bin
occurs before /usr/bin. Here is a one-liner:
    echo export PATH="/usr/local/bin:$PATH" >> ~/.bash_profile

Warning: Your Xcode (x.y.z) is outdated
Please install Xcode a.b.c
The issues will depend on your specific installation. Use your best judgement about what to fix and what to ignore. Fixing one by one:
or if you do not have Git at all:
You can ignore this one.
You can ignore this one.
I had Python already installed before Homebrew, so I had to amend PYTHONPATH like so:
export PYTHONPATH=/usr/local/lib/python2.7/site-packages:$PYTHONPATH
echo export PYTHONPATH="/usr/local/lib/python2.7/site-packages:$PYTHONPATH" >> ~/.bash_profile
Then install PyQt (this also installs qt and sip):
Install QScintilla
Install Python Package Mananger (pip)
Install Pygments, iniparse and Mercurial Python packages. If you have Mercurial already, this will update it to the latest version.
Clone TortoiseHg repository using Mercurial:
hg clone http://bitbucket.org/tortoisehg/thg/ ~/Tools/TortoiseHg
cd ~/Tools/TortoiseHg/
hg update stable
Quick test. You should see TortoiseHg Workbench running:
Edit ~/tortoisehg-path.sh so it points to ~/Tools/TortoiseHg. This is what ~/tortoisehg-path.sh looks like after the change:
``` bash
export TORTOISEHG_PATH=~/Tools/TortoiseHg ```
Option + Drag the TortoiseHg.app from ~/Tools/thg-mac-app to your Applications folder.