This post is about configuring PHP/CURL root certificates for a WordPress installation running on Windows Server 2008 R2 / IIS 7.5.
Yesterday I was trying to add an RSS feed to the AVBlocks Wiki Site and I got this error:
``` text
WP HTTP Error: SSL certificate problem, verify that the CA cert is OK.
Details: error:14090086:SSL routines:SSL3_GET_SERVER_CERTIFICATE:certificate verify failed
In my case the [feed](https://groups.google.com/forum/feed/avblocks-support/msgs/rss.xml?num=3) was coming from the [AVBlocks Group](https://groups.google.com/forum/#!forum/avblocks) on Google. However, the Google Groups feeds are served via secure https:// protocol and that requires SSL for server-to-server communication. The problem is that WordPress uses *php\_curl*, and on a standard PHP installation of WordPress, *curl* does not come with the root certificate authorities installed.

Here is how to fix it:

1. You need to be running PHP 5.3.7 or later.
2. Download [mk-ca-bundle.vbs](https://raw.github.com/bagder/curl/master/lib/mk-ca-bundle.vbs) from the [Curl](https://github.com/bagder/curl/tree/master/lib) repository on GitHub.
3. Open a Command Prompt as Administrator and go to the directory in which you downloaded `mk-ca-bundle.vbs`.
4. Run `mk-ca-bundle.vbs`. Accept the default filename and do not include the text information for each certificate.
5. After running this you will end up with a file `ca-bundle.crt`.
6. Copy that to a known location, e.g. `{path}/ca-bundle.crt`.
7. Add `curl.cainfo={path}/ca-bundle.crt` to php.ini. See [PHP Runtime Configuration](http://php.net/manual/en/curl.configuration.php) for more details:

``` ini
[PHP]

;;;;;;;;;;;;;;;;;;;
; CURL Settings ;
;;;;;;;;;;;;;;;;;;;

curl.cainfo={path}/ca-bundle.crt
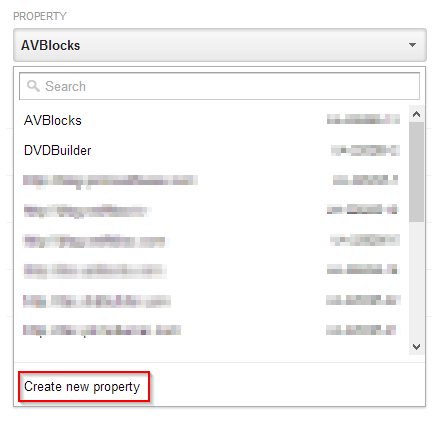
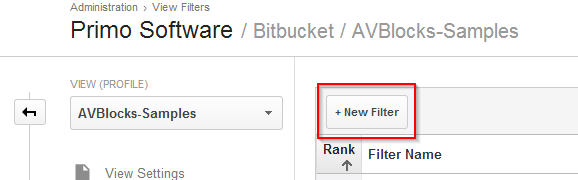
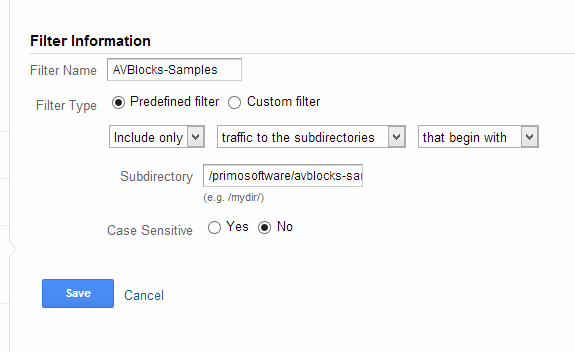
The idea is to create a new Google Analytics property for Bitbucket and then have a separate Google Analytics profiles for each repository. That way I end up with one profile per repository neatly grouped under the Bitbucket property. In the profiles, I also use filters to include only the traffic for the corresponding repository.
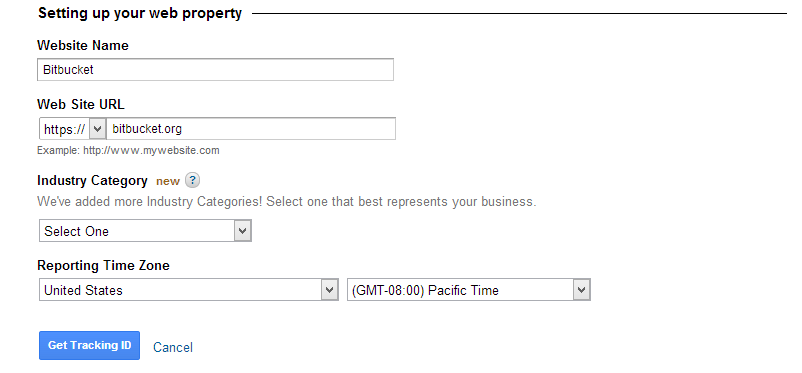
This post is about myself setting up Google Analytics for our AVBlocks-Samples repository, so in the steps below I use the “AVBlocks-Samples” name and the corresponding URL. Needless to say, when going through the steps, you will use the name and URL of your own Bitbucket repo. OK, here it goes:
Google Analytics will generate a new tracking ID for you, something that looks like “UA-123456-78″.
Copy the Tracking ID that Google generated
Go to the repository admin page on Bitbucket
Paste the Tracking ID into the “Google Analytics key” field.
## Update the Google Analytics profile
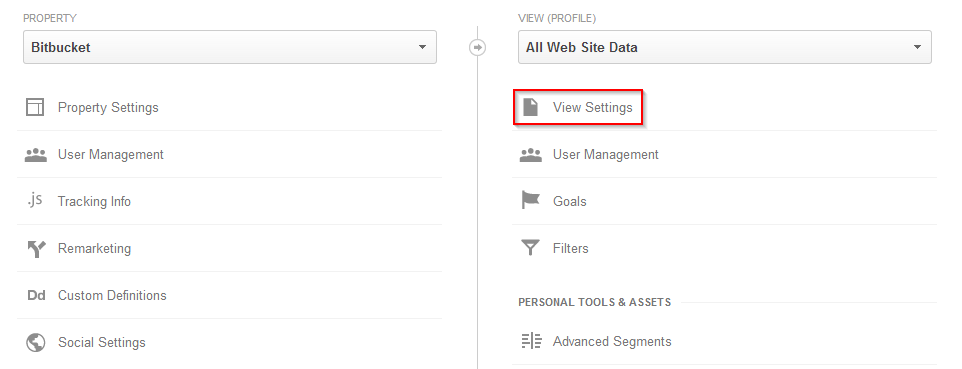
Go back to Google Analytics admin page
Select “Bitbucket” for property
Select “All Web Site Data” for profile
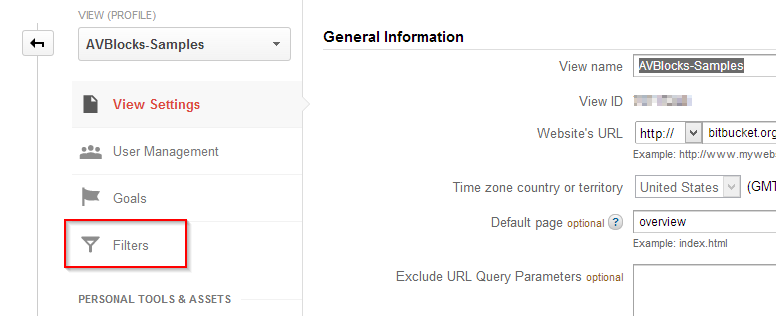
Click “View Settings”
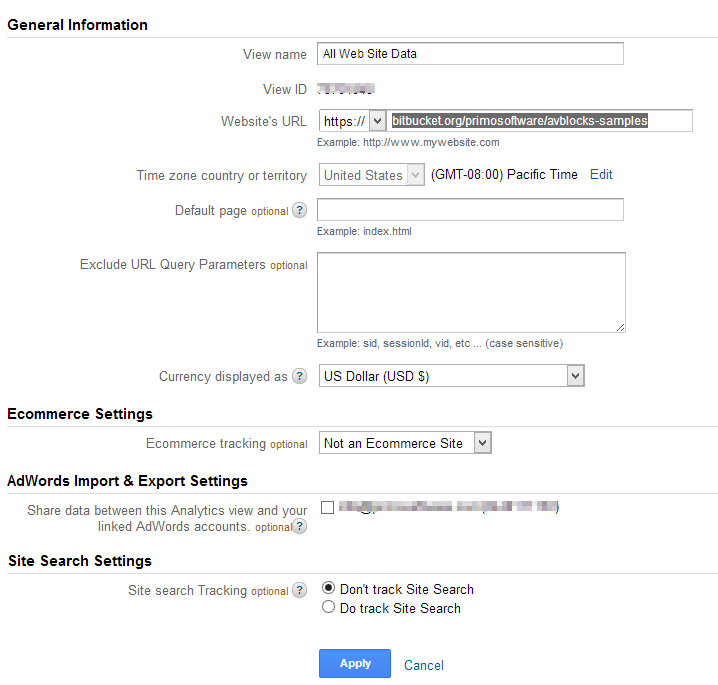
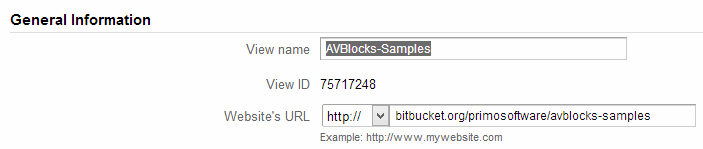
Update the Website’s URL with the full URL of your bitbucket repository.
In my case I put “https://” and “bitbucket.org/primosoftware/avblocks-samples”.
If you plan to have multiple repo profiles under the Bitbucket property, I recommend changing the View name to something other than “All Web Site Data”. I my case, I named my property “AVBlocks-Samples”.
I got this error in an ASP.NET MVC 4 application after installing DotnetOpenAuth via the Package Manager Console:
Could not load file or assembly 'DotNetOpenAuth.Core, Version=4.0.0.0, Culture=neutral, PublicKeyToken=2780ccd10d57b246' or one of its dependencies. The located assembly's manifest definition does not match the assembly reference. (Exception from HRESULT: 0x80131040)
The application was actually upgraded earlier from ASP.NET MVC 3, i.e. it was not autogenerated by Visual Studio 2012. The pre-binding info in the exception was:
=== Pre-bind state information ===
LOG: User = NT AUTHORITY\NETWORK SERVICE
LOG: DisplayName = DotNetOpenAuth.Core, Version=4.0.0.0, Culture=neutral, PublicKeyToken=2780ccd10d57b246
    (Fully-specified)
LOG: Appbase = file:///
LOG: Initial PrivatePath = \bin
Calling assembly : Microsoft.Web.WebPages.OAuth, Version=2.0.0.0, Culture=neutral, PublicKeyToken=31bf3856ad364e35.
===
LOG: This bind starts in default load context.
LOG: Using application configuration file: \web.config
LOG: Using host configuration file: C:\Windows\Microsoft.NET\Framework64\v4.0.30319\aspnet.config
LOG: Using machine configuration file from C:\Windows\Microsoft.NET\Framework64\v4.0.30319\config\machine.config.
LOG: Post-policy reference: DotNetOpenAuth.Core, Version=4.0.0.0, Culture=neutral, PublicKeyToken=2780ccd10d57b246
LOG: Attempting download of new URL file:////DotNetOpenAuth.Core.DLL.
LOG: Attempting download of new URL file:////DotNetOpenAuth.Core/DotNetOpenAuth.Core.DLL.
LOG: Attempting download of new URL file:////DotNetOpenAuth.Core.DLL.
WRN: Comparing the assembly name resulted in the mismatch: Minor Version
ERR: Failed to complete setup of assembly (hr = 0x80131040). Probing terminated.
The key pieces of information here are at lines 3 and 7. Basically, Microsoft.Web.WebPages.OAuth needs DotNetOpenAuth.Core 4.0.0.0, but the DotNetOpenAuth.Core I have is version4.3.0.0.
The solution is to add these lines under the / section of the root Web.config:
The above solution works for other packages that ASP.NET MVC 4 depends on. For example, if you upgrade WebGrease from 1.0.0.0 to 1.3.0.0, you have to add this to the / section: